Individual specifications can be reviewed, edited, and executed from the Specification Editor page. The page is layed out as a title and command bar at top, and a representation of the specification below in one of three modes:
Preview -- a read only view rendering of a specification perfect for reviewing and documenting a specification. Accessed by either clicking the "Preview" button at the top right.
Editor -- an editable rendering of the specification. Accessed by clicking the "Editor" button at the top right.
Results -- A rendering of the specification with any results. Accessed by clicking the "Results" button at the top right.
When you access a specification from the The Specification Explorer screen, you will be taken to the results view for the specification if it exists, or otherwise to the editor view.
Status Bar
If the specification is currently queued, executing, or has a recorded resort, a status bar is shown underneath the title and command bar like this one below from a specification with failures:
Status Bar with Failures

Status Bar with a Success

The status bar tells you the resulting counts if any, and when the specification was last executed in local machine time.
Useful Keyboard shortcuts
There are several keyboard shortcuts available in the specification editor screen to run specifications, stepthrough specifications, save, undo & redo, and navigate within the specification. See the Help link in the top of the UI to see a list of the available shortcuts.
Running, Saving, Undo/Redo Changes, and Opening the File
At the top left of the screen, just below the specification title, is a series of buttons providing contextual actions on a specification.
The Command Bar

From left to right, the buttons are:
The "Play" button queues the specification for execution. This button is disabled if the specification is executing or queued.
The second play button queues the specification up for the new Stepthrough Mode for Debugging
The save button is enabled if there are any outstanding changes to the specification. When the specification is saved, an alert will momentarily appear below the specification title.
Undo and Redo buttons to rollback any unsaved changes or to reapply changes that were previously rolled back.
An "Open" button that will try to open the underlying specification file in your default editor for xml files as a quick shortcut to make edits by hand. Any changes to the file should be reflected in the editor shorly after saving the file, but the file system watchers have been known to be slow sometimes. It's freqently quicker to make large scale reorderings directly to the file than it is with the editor.
Preview the Specification
The preview screen is the cleanest, most readable way to view the content of a specification. This mode is intended to be used for reviewing and documenting the expected behavior of the system under test.
The Preview Screen

The Results Mode
The results view will display the specification with all the results rendered as:
- Successful facts, assertions, and set matches in green
- Unsuccessful facts, assertions, and set matches in red
- Errors in yellow
At the bottom of the specification results is a table for the performance timings of the specification execution, the Debug.WriteLine() tracing from .Net, and any custom logging output.
See Instrumenting and Performance Logging for more information on using this feature.
The Results View

If the specification is currently executing, the results view updates incrementally to reflect the status of the current execution.
Changing the Lifecycle
The lifecycle of a specification can be altered by toggling the "Acceptance" or "Regression" button on the top right of the specification page. The current lifecycle is shown on the button. Unlike Storyteller 1-2, you do need to explicitly save the specification after changing the lifecycle.
Editing a Specification
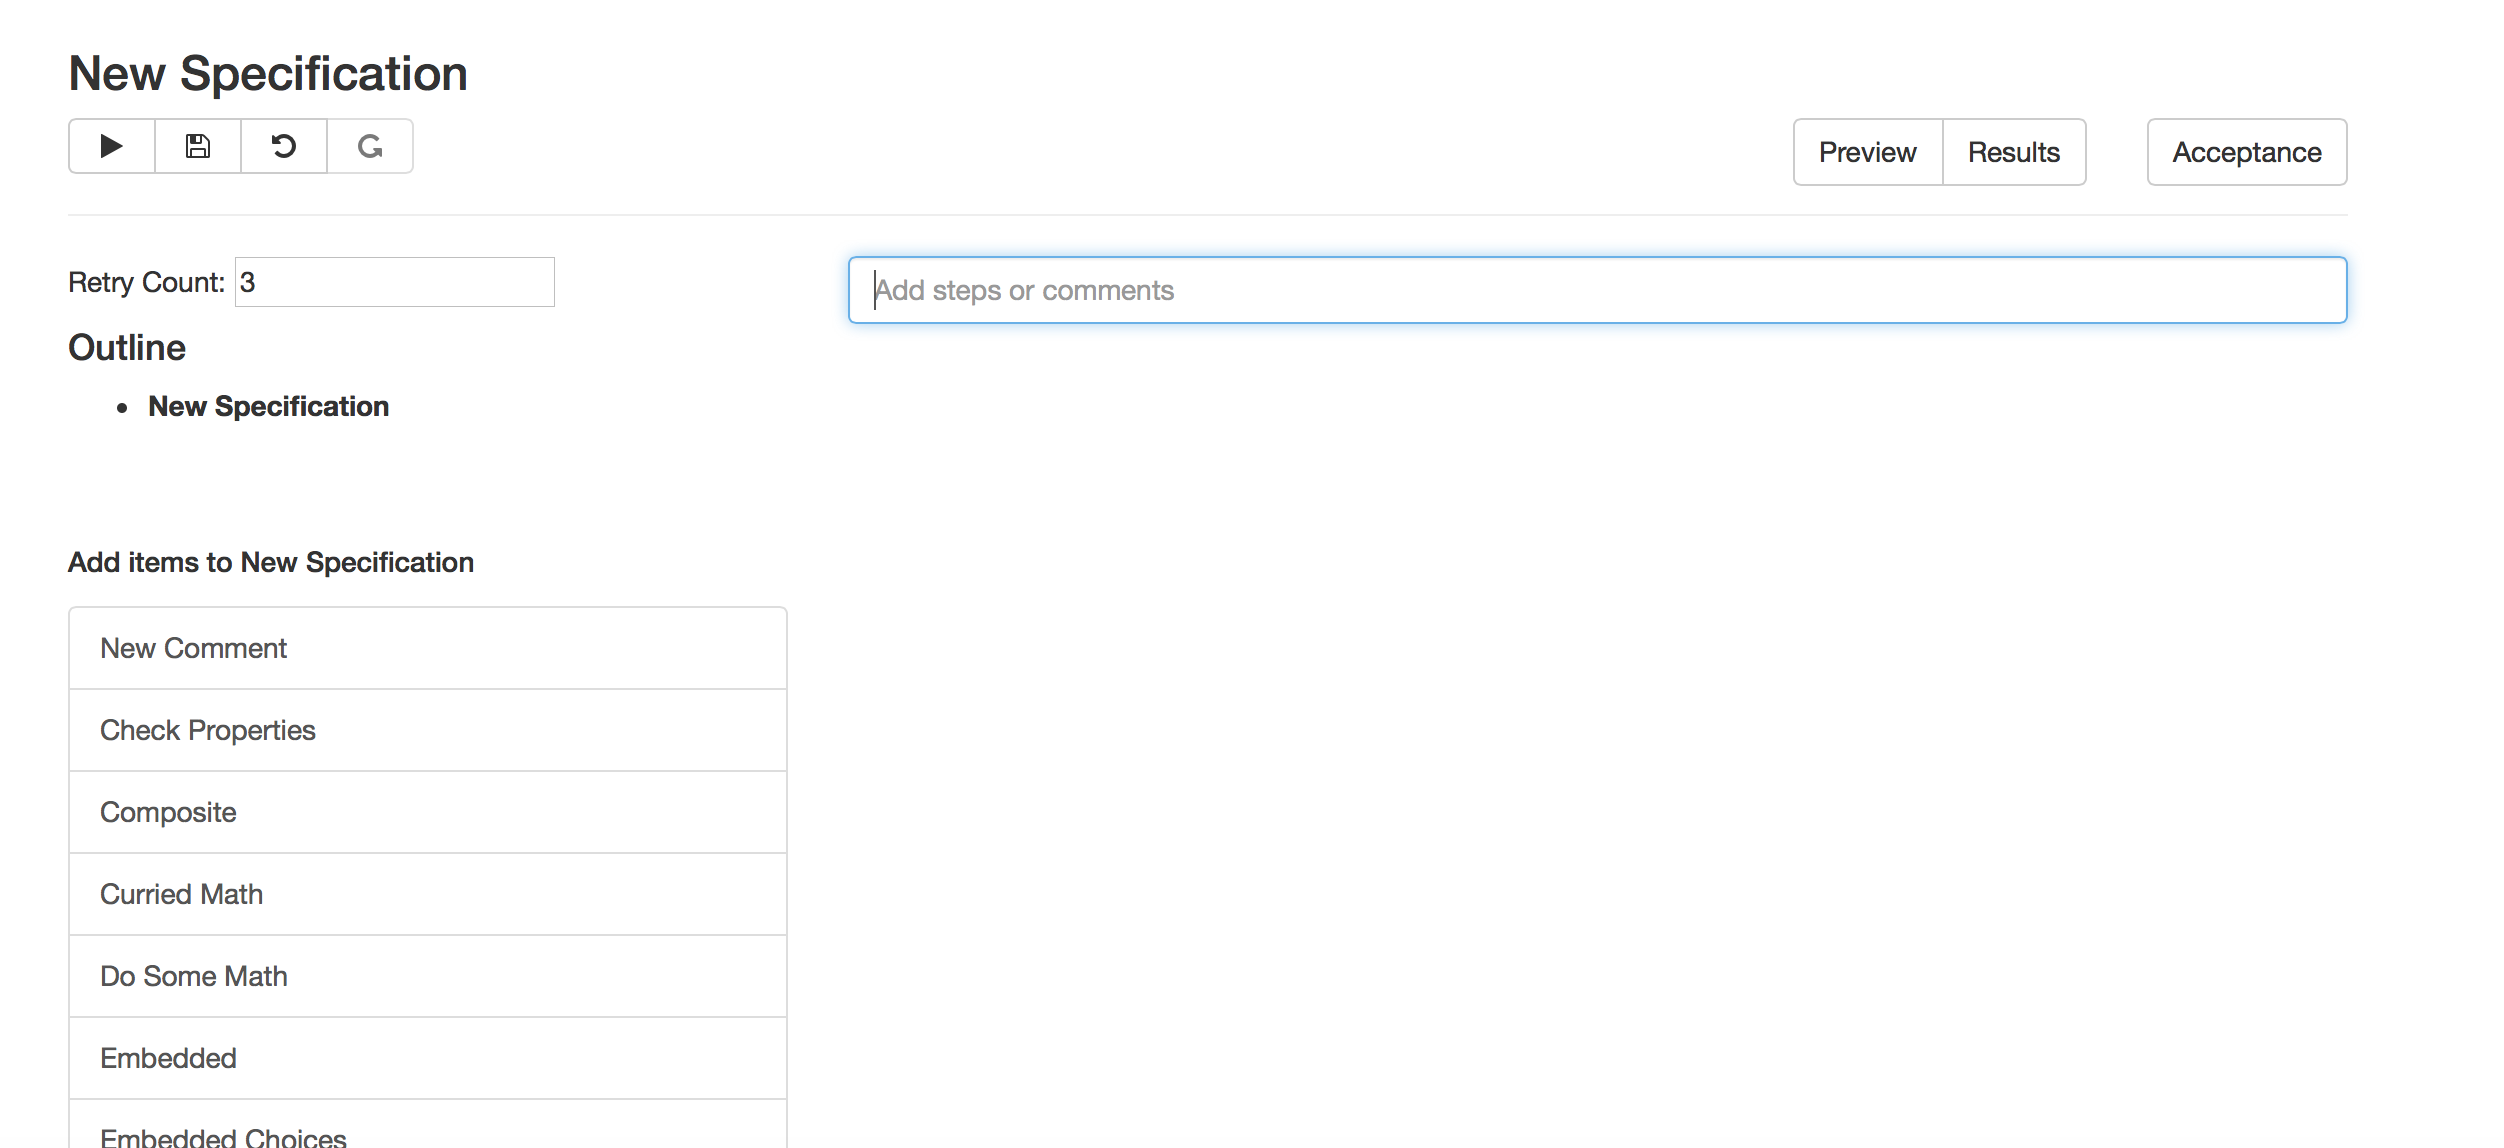
The editor screen is divided into two vertical panes. The left pane holds the specification outline explained in a later section and contextual controls related to the active section in the main pane. The main pane at the right holds all the controls necessary to add or delete sections, steps, and comments and edit the information in the specification.
The Editor View

The maximum retry count for the specification can be edited by changing the textbox at the top left of the contextual pane.
Individual cells in the specification are edited by either textbox's, checkbox's, or select box's depending on the type of cell. Only the active cell is shown in an editable form. All other cells are in a "preview" mode to enhance the legibility of the specification while editing (this was a major shortcoming in Storyteller 1-2).
Editing Cells

The Specification Outline and Step "Containers"
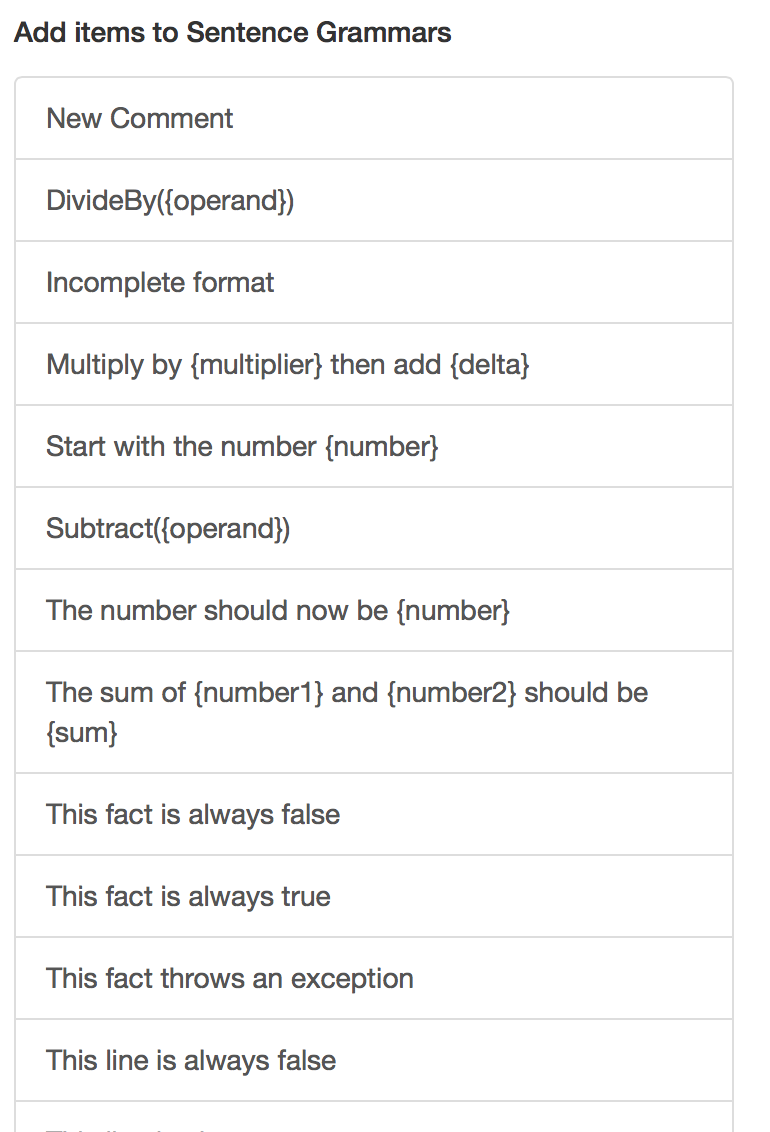
The specification itself, top level sections, tables, and embedded sections can all act as "containers" that are composed of simpler steps. Inside the specification editor, only one container can be active at any one time. The contextual controls in the left pane of the editor are dependent upon the active container:
Specification -- the left pane will have a list of all the available
Fixturetypes by title to add a section to the bottom of the specification. There is also a link to add a comment directly to the specification itself.Section -- the left pane will have a list of all the available
Grammar'sin theFixtureused by that section as well as a link to add a commentEmbedded Section -- the left pane will have a list of all the available
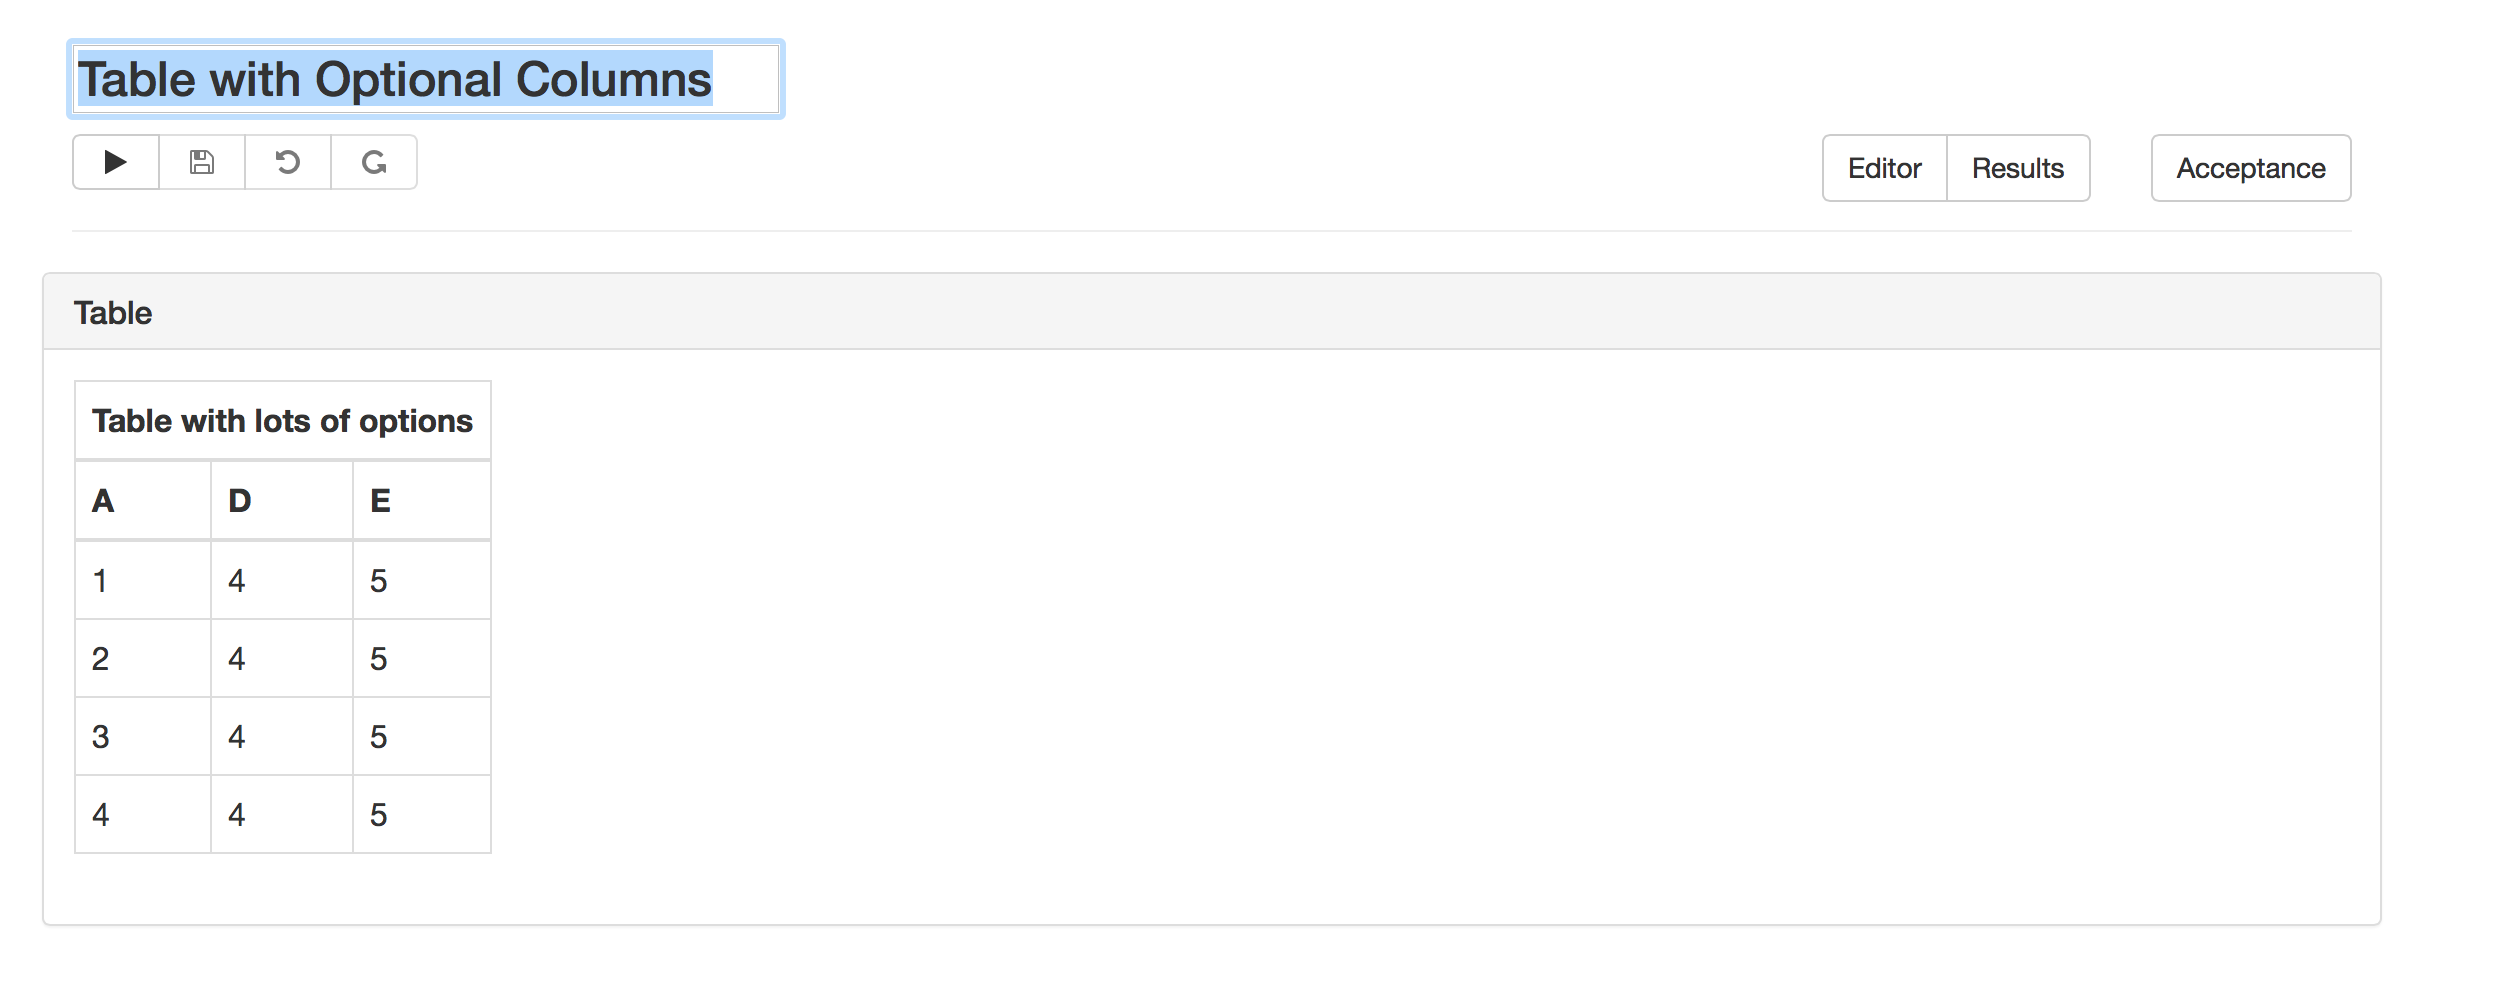
Grammar'sin theFixtureused by that embedded section as well as a link to add a comment.Table -- if there are any optional columns, you will see a small control to turn optional columns on or off within that table
You can activate a container by either:
- Click or tab into a cell directly within that container to make that cell the active cell
- Click the "add steps or comments..." link at the bottom of a section or the "add sections or comments..." link at the bottom of the specification
- Use the specification outline explained below
The outline structure of the containers within a specification is shown in a tree list control at the top left of the contextual pane:
The Specification Outline

The active container will be shown in bold. Clicking on any other container title in this control will make that container be the active container.
Adding Sections
Starting from a new specification, the most likely first step will be to add the first section. The initial state will look something like this:
Initial Specification State
In the contextual pane you can see that there is list of all the available Fixture's ordered by title. You can add a section by clicking on one of the fixture titles or by using the lookup control for adding sections in the main pane as shown below:
Adding a new Section via Lookup
Adding Steps to a Section
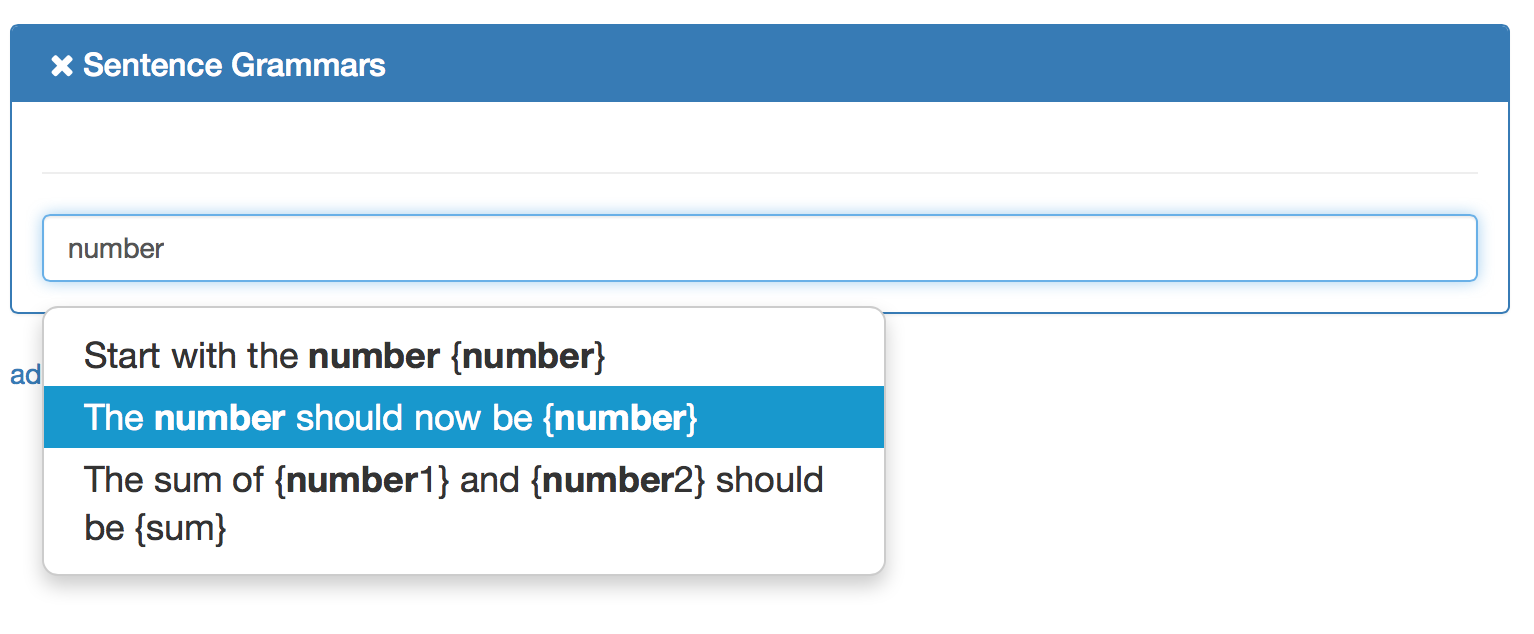
Once a section is the active container, you can add steps to a section by using the contextual controls for each grammar in the contextual pane on the left as shown in this example:
Add a step from the contextual menu on the left
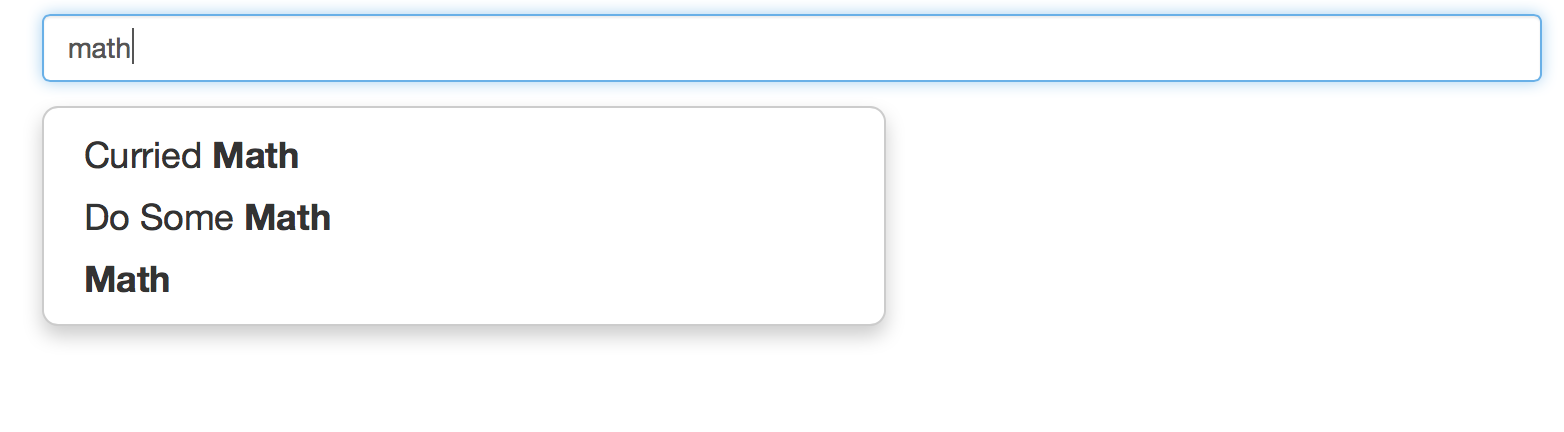
Or by using the lookup control at the bottom of the section in the main pane. If the section is not active, you will see a placeholder link at the bottom like this image below:
The 'add steps or comments' placeholder

After clicking on this link, you should now see a lookup textbox that you can use to add new steps (or comments) by typing out the title or sentence format of an available grammar as shown in the next image:
WHAT?
Deleting Steps, Sections, or Comments
Any step, section, or comment in the specification body can be removed by clicking the 'X' icon at the top left of the item as shown below.
Deleting

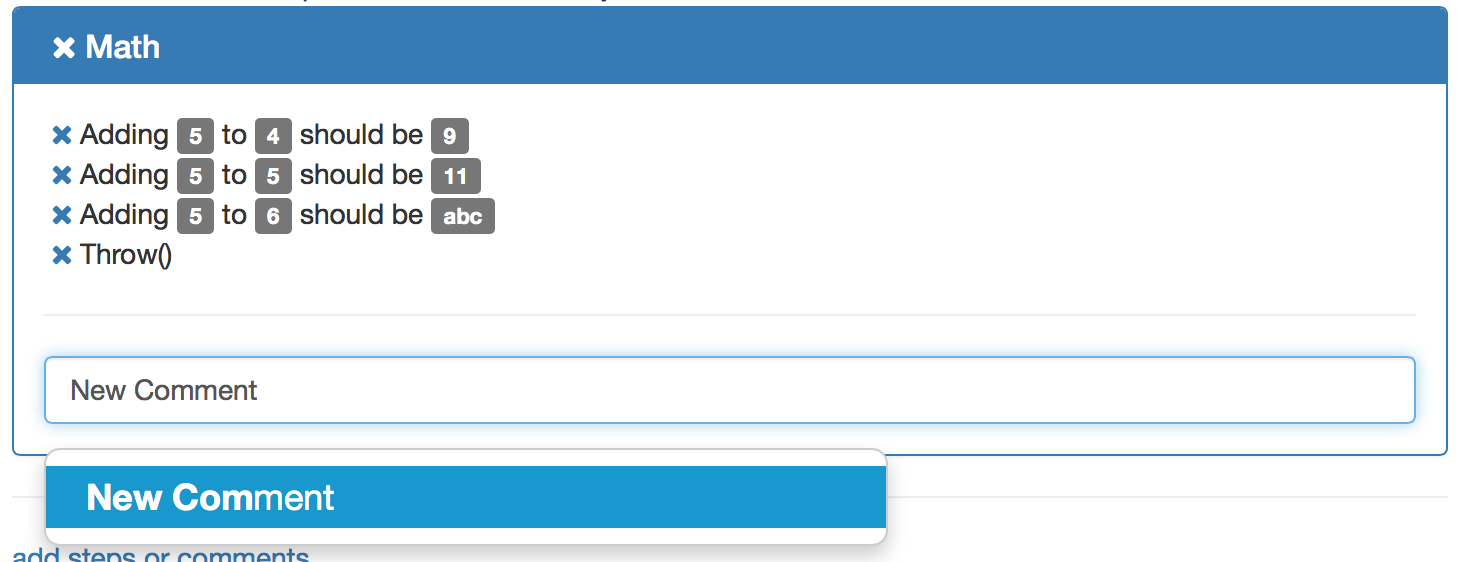
Adding Comments
Comments can be added to the active container by either via the add section or add step lookup controls as shown below:
New Comment via the Lookup
Or by the contextual links in the left pane for an active container:
New Comment via the Contextual Links

Reordering Steps or Sections
Sections, comments, and steps can be reordered by clicking on the up and down caret icons in the editor controls.
Sections, comments, and steps can also be reordered within their parent container by using keyboard shortcuts:
- Reorder steps or sections by moving the active step or section up with
ctrl + alt + uporctrl + pageup - Reorder steps or sections by moving the active step or section down with
ctrl + alt + downorctrl + pagedown
Renaming the Specification
The specification name can be edited by clicking on the specification name and editing the text. As with all changes, the specification is not automatically saved.
Renaming the Specification
Working with Tables
Table and Set Verification grammars have their own controls for editing. A table editor looks like this:
Editing Tables

Each row has an X icon to delete an individual row and an icon that will clone the row when clicked. At the bottom is an "Add Row" link that when clicked, will add a new row to the bottom of the table.
When a table with optional columns is the active container, a contextual control to toggle these columns on and off is shown in the left pane:
Toggling Optional Columns
